Your cart is empty!
Global
The Global section of VikAppointments contains the Custom Fields, the Payment Gateways, the Status Codes, the Taxes, the Invoices Archive, and the Media Manager.
Custom Fields
The custom fields are used to receive all the information you need about your customers.
They are displayed in the appointment confirmation page, in the packages confirmation page and in the subscriptions page (for customers), before to store the order in the system.
The custom fields can be also used to collect additional details about the subscribed employees. This is helpful for those websites that run a portal of employees. In fact, thanks to these fields it is possible to extend the filters used by the Employees Filter module and to collect additional data, such as an ID card.
Any custom fields translations can be made by clicking the flag of a record, under the Languages column.
- Group - select the group for which the custom field will be used.
Choose customers if the field will be used to collect information during the purchase (default).
Choose employees if the field will be used within the registration form of an employee. - Field Name - the text to display in the label next to the input field (i.e. First Name).
This field can be translated in multiple languages. - Form Name - specify a unique name that will be used within the forms and URLs. If you leave this field empty, the form name will be taken from the field name. This field is available only if the custom field is meant to be used by the employees group.
- Description - an optional text used to describe the purpose of the field. If specified, next to the field name will be displayed a tooltip icon.
- Type - the type of the input to display. The values allowed for the type are the followings: Text, Textarea, Number, Date, Select, Checkbox, File, Separator.
- Rule - the rule that the custom field will have to use. For example, a custom field can be used to collect a nominative, an e-mail, a phone number, a city, etc...
- Required - enable this option if the customers cannot leave this field blank. The order will be stored only when all the required custom fields will be filled-in. The label of the required options will contain the * symbol.
- Repeatable - enable this option to repeat this custom field for each attendee of the appointment. Useful in case you need to collect, in example, the name of all the participants.
- Language - choose for which language the custom field should be visible. Do NOT use this parameter to apply fields translations. For this purpose, use the apposite multilingual feature instead.
- Employee - specify an employee to make this field available only in case that employee was selected for the appointment.
- Services - specify one or more services to make this field available every time one of these services is selected for the appointment.
Here you can see a detailed description about all the possible types of the custom fields.
Text Type
The text type displays a default html text input tag. It is used to receive short texts, such as any billing details.

Textarea Type
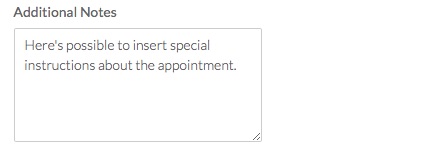
The textarea type displays a default html textarea tag. Since this field is resizable, it is helpful to receive medium and long texts, such as additional instructions.
When this type is selected, the custom field will be able to define additional settings.
- Use Editor - enable this option to use a visual editor instead of a plain textarea. Only the custom fields for the employees support this parameter.
Number Type
The number type displays a default html number input tag. It is used to collect integer and decimal amounts.

When this type is selected, the custom field will be able to define additional settings.
- Min - the minimum allowed number (negative or positive). Leave empty to ignore this restriction.
- Max - the maximum allowed number (negative or positive). Leave empty to ignore this restriction.
- Accept Decimals - enable this option if the customers can insert decimal amounts. Otherwise only integers will be accepted.
Date Type
The date type displays a custom calendar field. When the input grabs the focus, a datepicker will be opened to select a date. It should be used to collect dates, such as the date of birth.

Select Type
The select type displays a default html select tag. The options of the dropdown can be defined from the details page of the custom field.

When this type is selected, the custom field will be able to define additional settings.
- Multiple - enable this option if the customers can select more than one value.

In addition, it is possible to use the ADD ANSWER button to insert all the values that can be selected by the customers. By dragging the 3-dots icon next to the values in order to change the ordering of the options. All the options can be translated in multiple languages.
Checkbox Type
The checkbox type displays a default html checkbox input tag. It is used to receive only true/false values (1/0 or yes/no).
The value of the required checkboxes, such as terms and conditions, is not stored because they can assume only one value (TRUE).

When this type is selected, the custom field will be able to define additional settings.
- Popup Link - the url of the page you want to show as popup. By clicking the label of the field, it will be displayed a popup containing the specified URL. It is suggested to use the tmpl=component attribute (in query string) to ignore the template and to show only the page content. This option is useful for Terms & Conditions checkboxes.
File Type
The file type displays a field to upload files into the server. The file extensions allowed can be defined from the details page of the custom field and must be separated by a comma (like png, jpg, pdf). The available extensions can be seen in the front-end between the parenthesis.
For security reasons the name of the images will be automatically changed in a secret code.

This is how the file field works when customers have already uploaded a file.

When this type is selected, the custom field will be able to define additional settings.
- Allowed Files - all the file extensions, separated by a comma, that can be uploaded (e.g. "png, jpeg, jpg"). Leave this field empty (UNSECURE) to allow the upload of any file type.
- Multiple - when enabled, the customers will be able to upload more than one file.
Separator Type
The separator type simply displays the name of the custom field. This custom field is not able to collect information.
It is possible to change the style of the separator by editing the CSS rules of the class .vapseparatorcf.
When this type is selected, the custom field will be able to define additional settings.
- Class Suffix - a suffix to be applied to the CSS class of the field. This allows for individual field styling.
Rules
Here's the list of all the rules that the custom fields can use.
Nominative
This rule is used to collect a nominative (like First Name, Last Name or Full Name). All the nominative custom fields will be merged with a space in the middle. The resulting nominative will be assigned to the purchaser nominative field of the reservation.
E-Mail
This rule is used to collect an e-mail address. Only one field should have this option enabled, otherwise only the last specified e-mail address will be used. The resulting e-mail will be assigned to the purchaser mail field of the reservation.
Phone Number
This rule is used to collect a phone number. Only one field should have this option enabled, otherwise only the last specified phone number will be used. The resulting phone number will be assigned to the purchaser phone field of the reservation.
When this option is enabled, it is possible to specify the default country of your website, so that the phone prefix dropdown (next to the input) could be pre-selected with a default value.
State/Province
This rule is used to collect a state or a province. It is helpful to collect immediately the billing information of the customers.
City
This rule is used to collect a city. It is helpful to collect immediately the billing information of the customers.
Address
This rule is used to collect an address. It is helpful to collect immediately the billing information of the customers.
ZIP
This rule is used to collect a ZIP code. It is helpful to collect immediately the billing information of the customers.
Company Name
This rule is used to collect a company name. It is helpful to collect immediately the billing information of the customers.
VAT Number
This rule is used to collect a VAT number. It is helpful to collect immediately the billing information of the customers.
How to override a custom field
If you are looking for a way to change the HTML of a custom field in the front-end, you should know that the custom fields use specific layouts. This means that you can create some overrides directly from your template.
For example, if you need to change the layout of the TEXT input, you have just to follow these steps:
- Open the back-end of your Joomla.
- Visit the Extensions > Templates > Templates page.
- Edit the active template.
- Access the Create Overrides tab.
- Select Layouts > com_vikappointments > form.
- start editing the fields/text.php file on your template to create your own layout.
Payments
The payment gateways are used to collect credit/debit cards payments from your website.
There are 2 different types of gateways: Seamless and Hosted.
With seamless payment gateways your customers won't leave your website because the credit card details will be filled through an apposite form. For this type of payment, the SSL certificate is required.
The hosted payment gateways will redirect the customers to a payment page hosted on your bank website. At the end of the transaction they will come back on your website and they will see the status of the order changed (only in case of success). For this type of payment, the SSL certificate is optional.
In the package you can find 3 pre-installed payment gateways: PayPal, Offline Credit Card, Bank Transfer.
The payment gateways will be used when the total cost of the order is higher than 0.00 and there is at least a published gateway.
It is possible to make a payment only when the status of the order is PENDING.
- Payment Name - the name of the payment to display in the front-end.
This value can be translated in multiple languages. - File Class - the corresponding .php file of the gateway. The file is mandatory, otherwise the system won't be able to show the payment form and to process the transaction. When you change the value from the dropdown, the system will load a form with the parameters of the payment.
- Published - disable this option if you don't want to allow the customers to make payments through this gateway. Even if a payment is unpublished, it is still selectable by the administrators.
- Allowed For - choose for which section the gateway should be used (appointments purchase, packages & subscriptions or both).
- Access - the access level group that is allowed to view this item. By selecting registered option, all the guest users won't be able to use this payment.
- Cost - an additional charge/discount for this gateway. The selected amount will be displayed near the name of the payment (when it is different than 0.00). This value can be used to prevent fees or to make little discounts. When a gateway with additional cost is selected, the total cost of the order will be changed.
- Tax - an optional tax rule to apply to the charge of the payment during the purchase.
- Auto-Set Order Confirmed - this parameter is used to skip the payment form and to automatically CONFIRM the orders. When this option is enabled, there won't be a transaction between the bank and the customer. Keep this option disabled in case this payment method is used to collect online credit/debit cards.
- Icon - an icon of the gateway that will be used during the selection of the payment. It is possible to select one of the pre-installed font icons or to upload a new one.
- Output Position - you can specify the position of the page in which the payment form should be displayed. The possible values are: Ignore, Top-Left, Top-Center, Top-Right, Bottom-Left, Bottom-Center, Bottom-Right. By selecting the Ignore value, the payment form will be placed in a position similar to Bottom-Left.
- Notes Before Purchase - a html description to display during the selection of the payment and before starting the transaction (only if the order is still PENDING). You can use this field to allow the users to follow certain instructions before the payment. The html can contain native Joomla content features (e.g. {load position MODULE_POSITION}) and it can be translated in multiple languages. In case of READ MORE separator, the short description will be displayed only within the confirmation page and the long description will be used for the order summary.
- Notes After Purchase - a html description to display after a successful transaction (only if the order is CONFIRMED). The html can contain native Joomla content features (e.g. {load position MODULE_POSITION}) and it can be translated in multiple languages.
- Ordering - a number to display the payments in ascending order. The payments with lowest ordering amount will be displayed first.
PayPal
The PayPal payment gateway (hosted) prints the standard orange PayPal button to start the transaction. The payment will start on PayPal website and, only after the transaction, the customers will be redirected to the order page on your website.
In case your customers don't own a PayPal account, they are still able to complete the payment by specifying the credit card details without having to create an account.
The parameters of PayPal requires only the e-mail address assigned to your PayPal account.
If you want to test the PayPal gateway without transfer real cash, you should enable the Sandbox parameter.
Due to TLS 1.2 requirements, the sandbox environment may be not able to confirm an order after a successful transaction.

Offline Credit Card
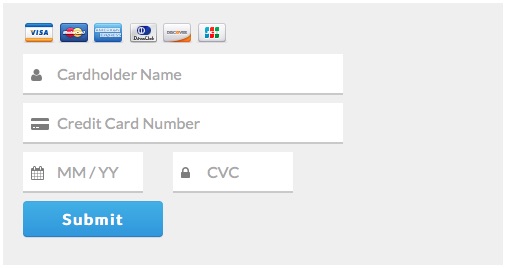
The Offline Credit Card payment gateway (seamless) is not a real method of payment. This gateway collects the credit card details of your customers in order to make the transaction with an offline POS.
After the form submission the status of the order will be changed to CONFIRMED. If you want to leave the status as PENDING (and confirming it manually) you have to change the Default Status setting from the parameters of the gateway. From the settings of the gateway you can also choose all the accepted credit card brands.
For security reasons, you won't be able to see all the credit card details simultaneously.
In fact, after the form submission, the system will send a notification e-mail to the administrator containing a portion of the credit card number (e.g. 4242 4242 4242 ****) and a link to see the remaining details of the credit card.
The link points to the reservations page in the administrator section, in which you have to click the See Credit Card button. This page contains all the following details:
- Credit Card Brand (Visa, MasterCard, American Express, JCB, Discover, Diners Club)
- Cardholder Name
- Credit Card Number (stored partially, e.g. **** **** **** 4242)
- Valid Through (month / year)
- CVC (or CVV or CV2)
The details stored in the database are encrypted to be not visible in case of unauthorized accesses to the database.
Notice that the details of the credit card will be removed from the database automatically one day after the checkin of the appointment.
This gateway is PCI compliant.
Bank Transfer
The Bank Transfer (or Pay upon Arrival) payment gateway is used to skip the payment method process when you have other published gateways. This gateway usually means that you will receive the payment by cash when the customer will come to your company.
If you want to automatically confirm the order with this payment gateway, you have to enable the Set-Auto Order Confirmed option from the parameters of the gateway (it should be already active by default).
Status Codes
The status codes page lets you define all the statuses that the appointments, the packages and the subscriptions can assume.
Any status codes translations can be made by clicking the flag of a record, under the Languages column.
Status Code
- Name - the name of the status code.
This value can be translated in multiple languages. - Code - the unique code of the status. The status code accepts only letters (A-Z) and numbers (0-9). It is suggested to use no more than 2 characters.
- Color - the hexadecimal color of the status code.
Roles
The roles are used to form specific combinations, needed to the system to understand what's the correct status code to use at a specific event.
- Approved - flags an appointment/order as confirmed. Also used by the system to fetch the statistics.
- Reserved - this role can be used to lock the availability of an appointment or to flag the order as "stand-by".
- Expired - used when the confirmation is not made within the established range of time. This status role is used only by the appointments.
- Cancelled - assigned after a cancellation, usually made after a confirmation.
- Paid - flags an appointment/order as paid. This role is used while changing the status after a successful (online) transaction.
Here's a table containing all the supported combinations.
| Status | Approved | Reserved | Expired | Cancelled | Paid |
|---|---|---|---|---|---|
| Paid | ✔ | ✔ | ✖ | ✖ | ✔ |
| Confirmed | ✔ | ✔ | ✖ | ✖ | ✖ |
| Pending | ✖ | ✔ | ✖ | ✖ | ✖ |
| Removed | ✖ | ✖ | ✔ | ✖ | ✖ |
| Cancelled | ✖ | ✖ | ✖ | ✔ | ✖ |
| Refunded | ✖ | ✖ | ✖ | ✔ | ✔ |
The system must specify at least a status for each supported combination, otherwise an error will occur every time the system needs to use a missing one.
In case 2 or more status codes own the same roles, the system will always take the one with highest priority (based on their ordering). In example, the "No-Show" status code created by default shares the same roles of the "Confirmed" status, but, since this last one owns an higher priority, "No-Show" will never be automatically assigned by the system (it can be assigned only manually).
Publishing
- Appointments - enable this option if the status code can be used for the appointments.
- Packages - enable this option if the status code can be used for the packages orders.
- Subscriptions - enable this option if the status code can be used for the subscription orders (for both the customers and employees groups).
Description
he extended HTML description of the status code. The html can contain native Joomla content features (e.g. {load position MODULE_POSITION}) and it can be translated in multiple languages.
Here you can see what all the pre-installed status codes are and understand their purpose.
Confirmed
The order is approved, no further action is required by the customer, which is allowed to receive the booked service.
This status is automatically set in the following cases:
- after paying a deposit successfully;
- in case the total to pay is equals to 0 and the default status is set to CONFIRMED (shop configuration setting).
As long as the status is not PAID and the total to pay is higher than 0, the back-end will always report a "due" label to indicate the balance to pay.
Paid
Use this status to indicate that the customer doesn't have to pay anything else.
This status is automatically set after a successful transaction that covers the whole total amount (no deposits).
Pending
The order/appointment is waiting for a manual approval or for a payment by the customer.
An order remains as PENDING only for a limited ranged of time, established by the "Keep App. Locked for" configuration setting.
Removed
An appointment/order assumes this status in the following cases:
- a customer didn't pay the requested amount within the established range of time;
- an administrator/employee didn't confirm the appointment within the established range of time.
Only PENDING appointments can become REMOVED.
This status code is available only for the appointments.
Cancelled
This status is used when a customer cancels an appointment from the front-end. It is possible to disable the appointments cancellation from the configuration.
When a customer cancels an appointment, it won't be automatically refunded by the system. In case the User Credit setting is enabled, the total paid amount will be accredited to the user account. The customers can use their credit to book other services.
Refunded
Same as the CANCELLED status, with the difference that it should be used when a refund is manually issued from the bank/payment account.
No-Show
This status is never automatically used by the system. You are free to use it for the appointments that have never been completed. In case a customer doesn't show up at the appointment, flag the reservation with this status.
What are the benefits of this status? You'll be able to easily track the missed appointments, which are still counted while calculating the statistics of the system.
This status code is available only for the appointments.
Taxes
From this pages it is possible to define all the taxes rules required by your country.
Every time you create/edit an item that requires a cost, you are asked to choose a specific taxes rule or to use the default one. The default type of taxes can be selected from the Shop panel of the global configuration, under the Invoices section.
Any taxes translations can be made by clicking the flag of a record, under the Languages column.
- Name - the name of the taxes. This value can be translated in multiple languages.
- Description - an optional description for administrative purposes.
Tax Rules
For each tax it is possible to create one or more rules, which are applied sequentially to the given base price.
Details
- Name - the name of the rule (eg. VAT 20%). This value can be translated in multiple languages.
- Modifier - define how the rule should be applied. The rule can be applied to the initial price or in sequence to the resulting price, calculated in example by a previous rule.
- Math Operation - the type of operation to apply while calculating the resulting prices. By default there are 3 different operators: +%, -% and VAT.
- Amount - the amount that will be used by the math operation to calculate the resulting prices.
- Tax Cap - this places an upper bound on the amount of government tax a company might be required to pay. In this case the tax is said to be capped. This function is only required for some countries, where there is a maximum amount of taxes that cannot be exceeded. You can ignore this setting if nothing similar applies to your country of residence. In summary, when it is specified an amount higher than 0, the resulting taxes won't be higher than the specified amount.
Here's explained how the supported math operators work.
+% increases the given price by the percentage of the specified rule amount. In example, in case the amount is set to 20% and the price is equals to 150, the resulting price will be equals to 150 + (150 * 20 / 100) = 180, where the total gross is equals to 180 and the taxes are equals to 30. This operator can be used to apply excluded taxes.
-% decreases the given price by the percentage of the specified rule amount. In example, in case the amount is set to 20% and the price is equals to 150, the resulting price will be equals to 150 - (150 * 20 / 100) = 120, where the total gross is equals to 120 and the taxes are equals to -30. This operator can be used to apply a withholding tax.
VAT (included taxes) extrapolates the Value Added Tax from the given price, according to the specified rule amount. In example, in case the amount is set to 20% and the price is equals to 150, the resulting total gross will be the same and the taxes will be equals to 25. This operator, exactly as the name states, can be used to calculate the inclusive taxes.
Tax Breakdown
The tax breakdown can be used to split the calculated tax of a rule in different lines. The tax breakdown should be used in case a tax includes a percentage of a different type of tax, such as a federal fee.
- Name - the name of the tax breakdown (eg. Federal Taxes 6%). This value can be translated in multiple languages.
- Amount - the percentage part of the total taxes to which this breakdown is equals.
Lets take as example a tax rules that adds a 20% of taxes, which are built from a 6% of federal taxes. The resulting breakdown will be equals to:
- Taxes (14%)
- Federal Taxes (6%)
The sum of the breakdowns must be equals to the amount specified by the tax rule.
Test Taxes
Under the Taxes page in the back-end, you should be able to find a button named "Test Taxes". It is possible to use this tool to ensure that the created rules are working in the right way.
Here's an example of a composite tax that applies 3 different rules:
- Social Security contribution, 4%;
- excluded VAT, 22% on the resulting price;
- Withholding Tax, -20% on the initial price.
| Name | Rule | Total |
|---|---|---|
| Base price | / | 1.000 |
| Social Security contribution | +4% | 40 |
| Total compensation | / | 1.040 |
| VAT | +22% | 228,80 |
| Total invoice | / | 1.268,80 |
| Withholding Tax | -20% | 208 |
| Resulting total | / | 1.060,80 |
Invoices Archive
The Invoices page is an archive containing all the invoices that have been generated through the internal system invoicing system.
The navigation on the left-side shows the list of the months that own at least an invoice. While on the center section of the page there is a grid containing all the invoices for the selected month and year. In case there are a lot of invoices, it is needed to press the apposite button(s) to load the remaining ones.
It is possible to search an invoice by:
- order number (e.g. 684)
- order key (e.g. D8ULGI57I6BX839D)
- order number-order key (e.g. 684-D8ULGI57I6BX839D)
- invoice number (e.g. 06)
- invoice suffix (e.g. 2020)
- invoice number/suffix (e.g. 06/2020)
- group (appointments, packages or subscriptions)
The invoice filtering is always applied to the selected month and year.

By clicking the invoice name, a PDF will be opened on a different tab of your browser. By clicking the invoice icon, the invoice will be selected. The selected invoices can be deleted or downloaded. In case you need to download a single invoice, it will be downloaded as PDF. While if you need to download multiple invoices, the system will ZIP all them and it will be downloaded as a package.
Invoices Generation
From this page it is possible to generate the invoices monthly or to manually update a single one.
If you need to generate a few invoices only, you can do it directly from the reservations/orders page.
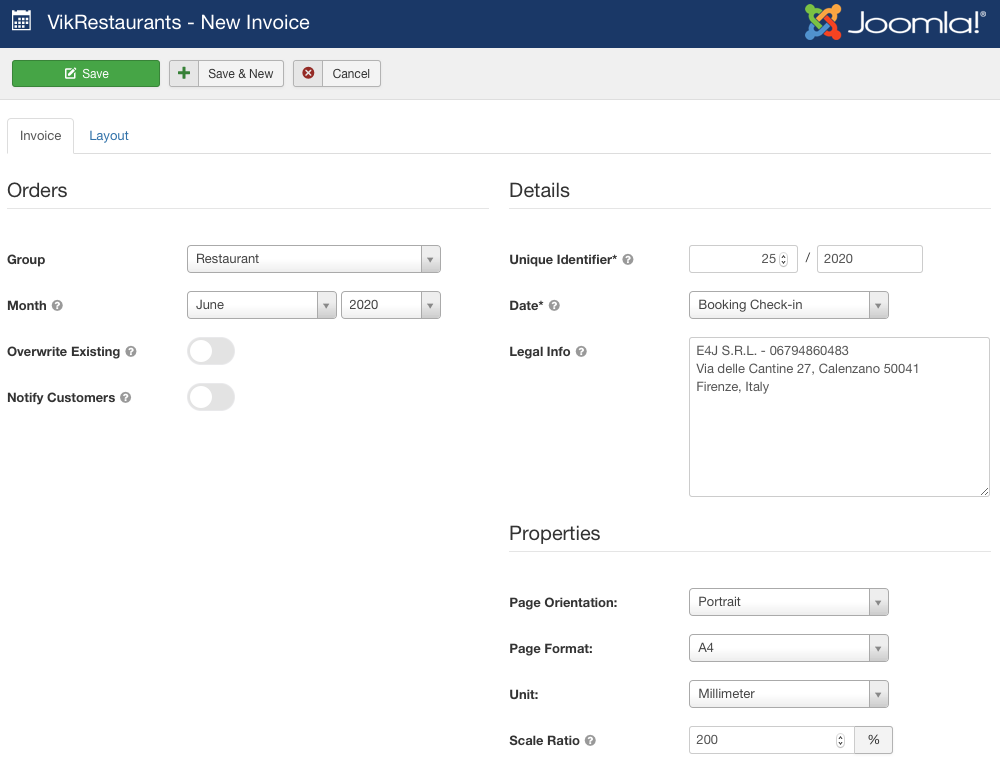
- Group - the group of the invoices to generate (appointments, employees subscription, packages or customers subscriptions).
- Month - the month and the year of the orders to fetch for a mass generation.
- Overwrite Existing - turn on this option to overwrite any existing invoices already generated for the matching order. Leave it unchecked to generate the invoices only for the new orders.
- Notify Customers - enable this option if you want to automatically send the invoices via e-mail to the customers, after the generation.
- Unique Identifier - the invoice number and suffix (e.g. 1/2020, or e.g. 1/SFX). The invoice number MUST be an integer. Every time a new invoice is generated, the invoice number is incremented by one.
- Date - the invoice date, which can be the current day (today), the purchase date or the date of the check-in. When editing an existing invoice, it will be possible to select a custom date from the related calendar.
- Legal Info - a few lines of text about the legal information of your company.
- Page Orientation - the page orientation of the invoice: Portrait (vertical) or Landscape (horizontal).
- Page Format - the page format of the invoice: A4, A5 or A6.
- Unit - the length unit to use for the invoice: Point or Millimeter.
- Scale ratio - all the images within the invoice will be scaled by the specified percentage amount. The higher the value, the smaller the images. Use 100% to leave the images at their original sizes.
TIP: if you need to restore the invoice number, for example after deleting an invoice, you can follow the steps below:
- open the invoices page;
- click the NEW button;
- select a month in the future which doesn't own any reservations;
- restore the invoice number;
- click the SAVE button;
In this way, none invoice will be generated and the invoice number will be reset.
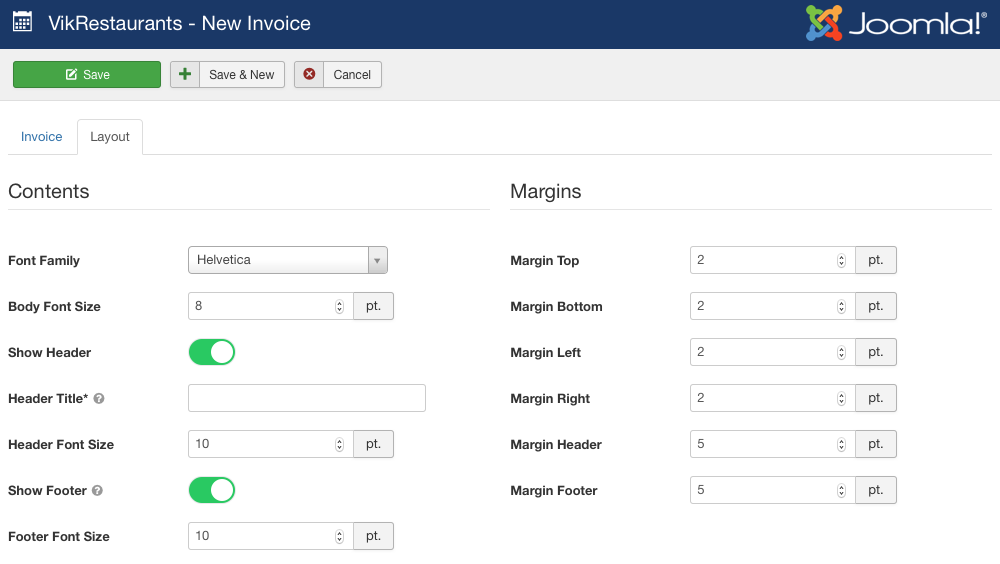
Invoices Layout
- Font Family - the family of the font that will be used while generating the invoice.
- Body Font Size - the font size used for the contents of the invoice (in points).
- Show Header - enable this option to display the heading of the invoice.
- Header Title - a title to be displayed on the top of the page. In case the text is not visible, it is needed to increase the Margin Top parameter until the title appears.
- Header Font Size - the font size used for the header of the invoice (in points).
- Show Footer - the footer only displays the number of the page (e.g. 1/2). In case the text is not visible, it is needed to increase the Margin Bottom parameter until the footer appears.
- Footer Font Size - the font size used for the footer of the invoice (in points).
- Margin Top - the margin from the top of the page (in points). In case the header is visible, the margin top should include also the height of the heading.
- Margin Bottom - the margin from the bottom of the page (in points). In case the footer is visible, the margin bottom should include also the height of the footer.
- Margin Left - the margin from the left of the page (in points).
- Margin Right - the margin from the left of the page (in points).
- Margin Header - the margin of the header from the top of the page (in points). Available only in case the header is enabled.
- Margin Footer - the margin of the footer from the bottom of the page (in points). Available only in case the footer is enabled.
Template Customization
The templates of the invoices are generated from the following files:
-- APPOINTMENTS --
/components/com_vikappointments/layouts/templates/invoice/appointment.php
-- PACKAGES --
/components/com_vikappointments/layouts/templates/invoice/package.php
-- EMPLOYEE SUBSCRIPTIONS --
/components/com_vikappointments/layouts/templates/invoice/employee.php
-- CUSTOMER SUBSCRIPTIONS --
/components/com_vikappointments/layouts/templates/invoice/subscription.phpIn case you need to customize the template of the invoice, it is possible to create an apposite override for the related layout:
- open the back-end of your Joomla;
- visit the Extensions > Templates > Templates page;
- edit the active template;
- access the Create Overrides tab;
- click Layouts > com_vikappointments > templates option;
- start editing the
html/layouts/com_vikappointments/templates/invoice/[appointment|employee|package|subscription].phpfile from the template editor to create your own layout.
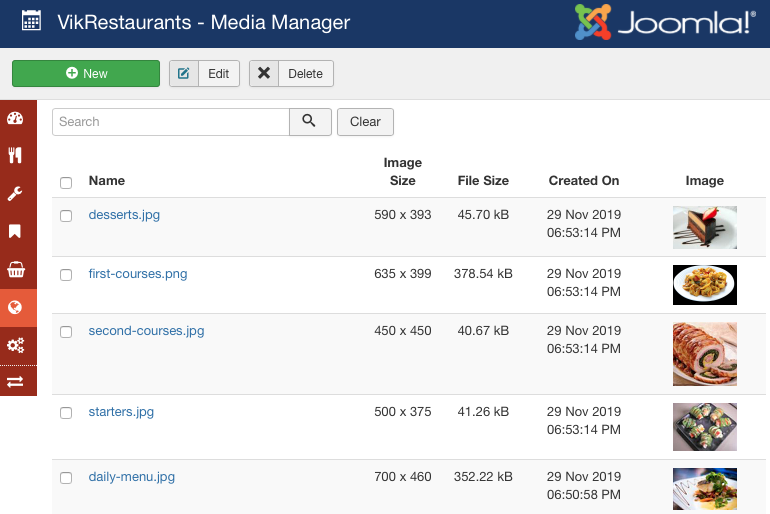
Media Manager
The Media Manager page contains all the uploaded images, which are used by the whole program.
A media is the representation of an image and its thumbnail. The original images are located into this folder:
/components/com_vikappointments/assets/media/
While the thumbnails are located in the folder
/components/com_vikappointments/assets/media@small/
The media files can be filtered only by name.
It is not possible to use the images stored within the Joomla Media Manager, unless you re-upload them into the folders used by VikAppointments.
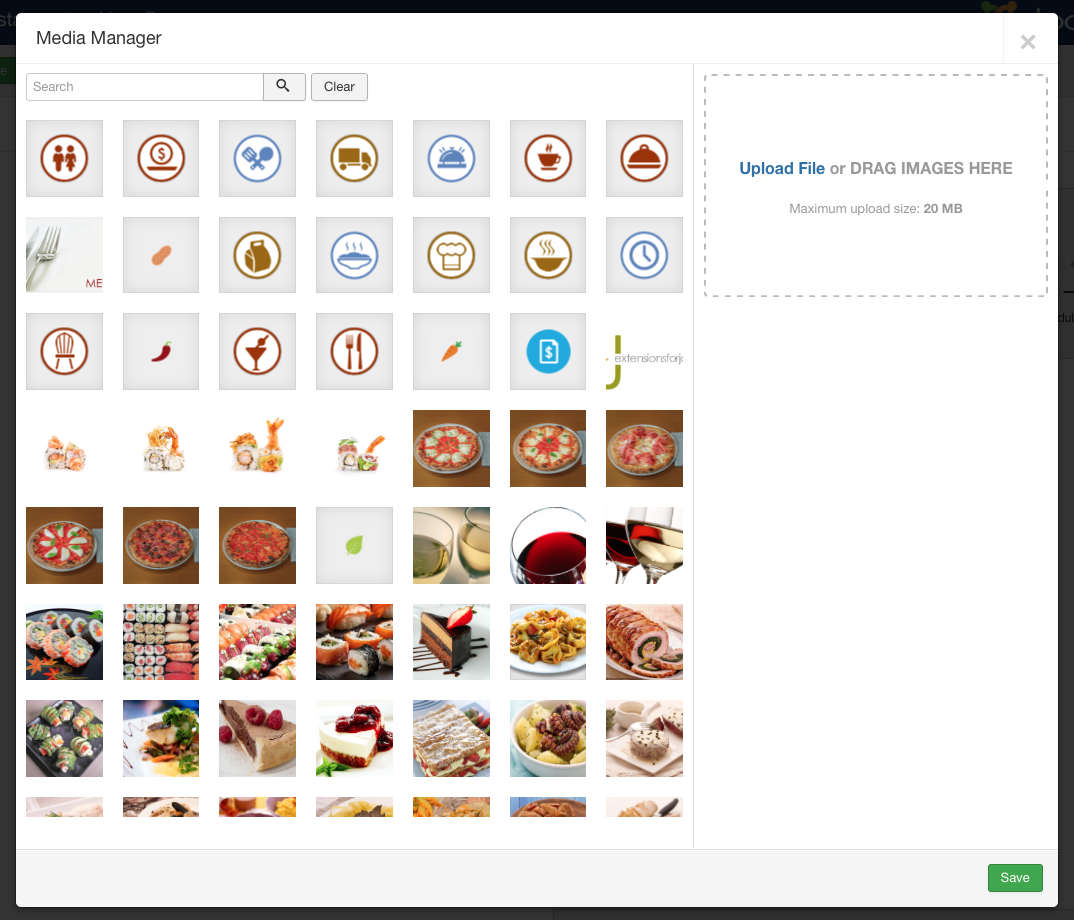
Usually, you are not forced to upload a new image through the Media Manager page, because a smart dialog (when an image can be used) will allow you to upload an image without leaving the page where you are.
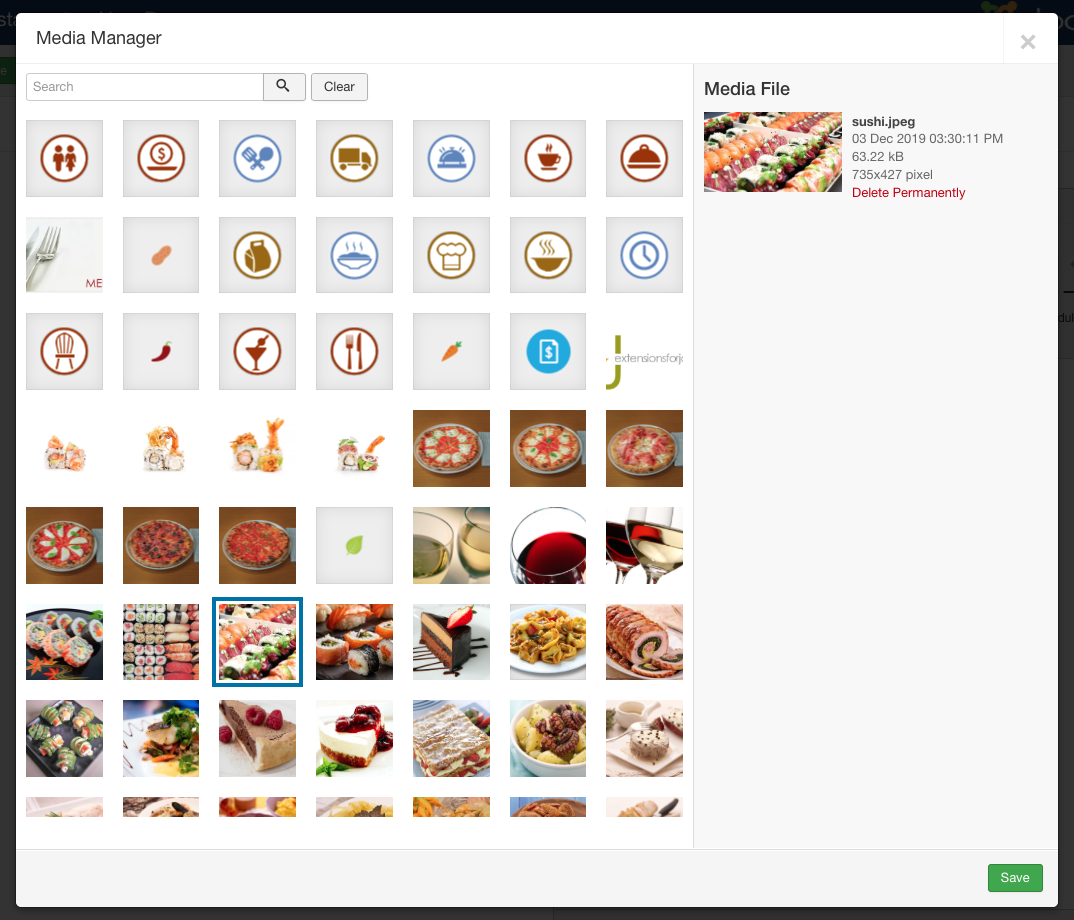
It is possible to select an existing image by picking it from the gallery. By clicking an image currently selected, the image will be cleared for the selected record.
The selected image will report a few details about the related file. In addition, it is possible to permanently delete the image by clicking the apposite button.
It is needed to hit the SAVE button in order to apply any changes.
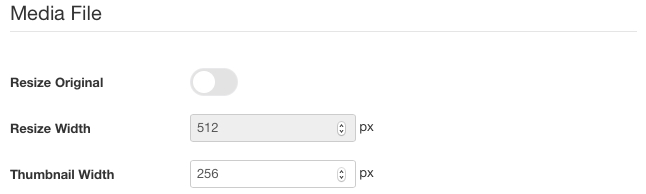
Media Properties
Before to upload a media, you should check the media properties to make sure it will be cropped in the right way.
- Resize Original - enable this option if you want to resize the original image.
- Resize Width - crop the original image with the specified width (the height will be resized proportionally). Cropping is applied only if the Resize Original option is enabled.
- Thumbnail Width - copy the uploaded image and crop it with the specified width (the height will be resized proportionally).
If you save a media without specifying a file, only the media properties will be changed.
Quick Upload
It is possible to upload multiple images in a quick way by using the Drag&Drop. Otherwise, by clicking the Upload File link, the system will show a popup from which it is possible to choose the file(s) to upload.
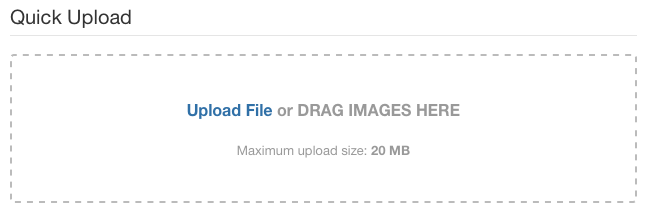
In the media creation page, you have to drag one or more files from your computer and drop them within the dashed gray box. All the images will be added in a queue and will be uploaded simultaneously.
All the images will be uploaded following the specified media properties.
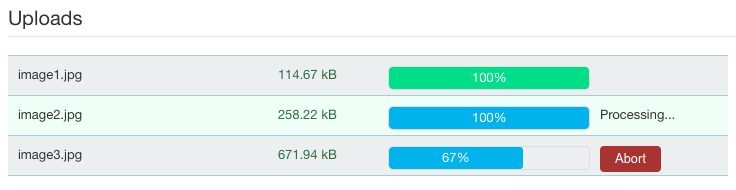
The images with 100% green status are successfully uploaded as media. The images with 100% blue status are completing the cropping of the thumbnail. The images with status lower than 100% are completing the upload of the original image. You can cancel the upload of an image by clicking the Abort button. It is possible to abort an upload only when the original image hasn't been uploaded yet.
When you upload a new image with the same name of an existing image, it will be concatenated a progressive number to the name of the new one.
Manage Media
It is possible to manage a media by selecting the select the image you need to handle and clicking the Edit button from the Joomla toolbar.
From this page it is possible to rename the media file and to replace the original and/or thumbnail images.
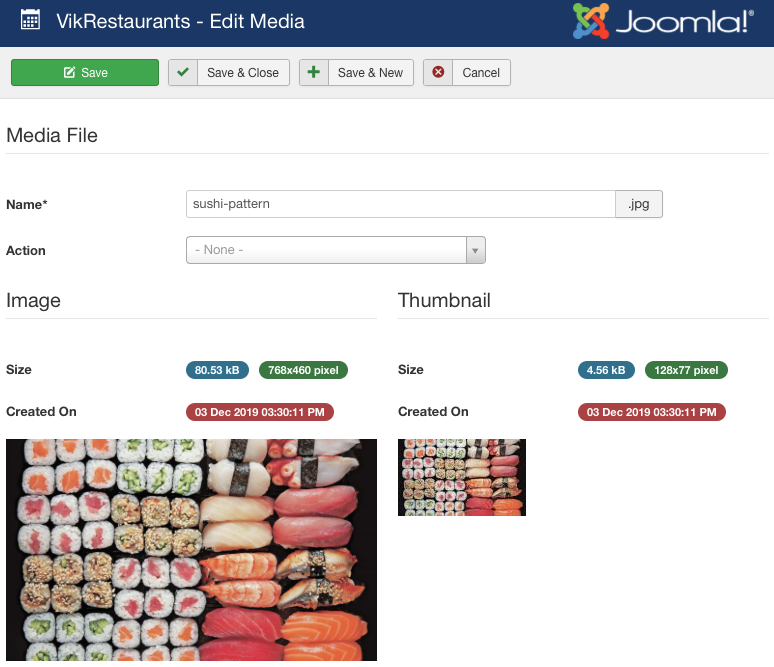
- Name - the name of the media.
- Action - the action to perform after saving the media. The possible actions are: do nothing, replace image, replace thumb, replace image & thumb.
Do Nothing
The action won't affect the images and only the name will be updated.
Replace Image
The action will replace the existing original image with the specified one.
Replace Thumb
The action will replace the existing thumbnail image with the specified one.
Replace Image & Thumb
The action will replace both the images related to this media. In this case, you will have to specify the media properties you need to use.
If an image doesn't own a thumbnail image, you should download the original image and use the Replace Image & Thumb action in order to re-create the thumbnail.
E-mail Custom Text
This section can be used to insert different contents in the e-mail for the customers depending on the status of the order.
In this way you can, in example, place details about the payment for PENDING orders or instructions to follow for CONFIRMED orders and so on.
To manage the e-mail custom text you have to open the global configuration of VikAppointments and click the Manage Custom Text button next to the E-Mail Template setting.
- Name - the name of the custom content of the e-mail. This is only an identifier text of the content.
- Position - the position of the custom content within template of the e-mail. The possible values are: {custom_position_top} (below the company name), {custom_position_middle} (below the order total cost), {custom_position_bottom} (above the order link), {custom_position_footer} (bottom of the page). You can see where are exactly these codes by opening the template of the e-mail.
- Status - you can display the custom content only when the status of the order is equals to this option (confirmed, pending, removed, cancelled). Leave empty to apply the custom text to any status.
- File - you can display the custom content only when the e-mail template file used is equals to this option. The e-mail template files are located in the folder /components/com_vikappointments/helpers/mail_tmpls/. Leave empty to apply this text to any file.
- Published - the status of the text. Only published texts will be included within the notification e-mails. Unpublished texts can be included within the e-mail for customers only manually when editing a reservation.
- Language - you can display the custom content only when the language selected from the customer is equals to this option. To create multi-lingual contents you have to duplicate a custom text and change the language tag and the content.
- Service - the custom content will be used only in case the appointment has been booked for the specified employee.
- Employees - the custom content will be used only in case the appointment has been booked for the specified employee.
- Content - insert here the HTML content that you want to display in the e-mail template at the selected position.
Conversion Codes
This area can be used to put javascript snippets within the document. As described by its name, the conversion codes can be used to track the actions performed by the customers (such as a Google Tracking Code).
It is possible to access the conversion codes list only from the global configuration of the program, by clicking the Manage button under the Enable Conversion Code setting (this value must be enabled first).
- Name - an identifier name of the conversion code (only for back-end purposes).
- Published - enable this option whether the conversion code should be included within the document.
- Status - select the statuses for which the conversion code should be used. For example, in order to track the completion of an order, only the CONFIRMED status should be selected.
- File - in case the conversion code requires an external JS file, it is possible to specify here the absolute URI of the script to include.
- Page - select the page in which the conversion code should be used. For example, in order to track the completion of an appointment, the Order page should be selected.
- Type - select the type for which the conversion code should be used. For the moment, the system is only able to track standard reservations (appointments). In the future, the system may start supporting also the packages and the subscription.
- Code Snippet - the code snippet needed to start tracking/converting the customer. Since 1.6.5 version of VikAppointments, this field accepts both pure JavaScript and HTML code. It is also possible to include script and noscript tags.
Cron Jobs
The Cron is a time-based job scheduler which runs periodically a process at fixed times, dates, or intervals. It is possible to use cron jobs only if crontab is installed on your server.
You can check how to install a cron job on your server from here:
https://extensionsforjoomla.com/documentations/vik-appointments#configuration-cron-jobs
In the package you can find 5 pre-installed cron jobs: Appointment E-Mail Reminder, Appointment SMS Reminder, Employee Review Reminder, Service Review Reminder, Employee Subscription Reminder.
To manage the cron jobs you have to open the Cron Jobs configuration of VikAppointments and click the "See Cron Jobs List" button.
- Name - the name of the cron job. This is only a text identifier of the element.
- Class - the corresponding .php file of the cron job. The file is mandatory, otherwise the system won't be able to execute the process of the cron job. When you change the value from the dropdown, it will be loaded a form with the settings of the cron job to fill-in.
- Published - disable this parameter if you don't want to execute the process of the cron job. If this job is correctly configured on your server, you should also stop it from your Control Panel, otherwise the cron will continue to be contacted and the error "cron not found" will be stored into the logs.
When you create a cron job the system will automatically launch the installation to adapt the database structure. It is possible to install more than one cron job of the same type, so that you can send (in example) the same reminder one day in advance and 2 hours in advance.
It is possible to launch manually a cron job by clicking on the apposite rocket icon. In this way the process of the cron will be executed immediately.
Cron Jobs Logs
Every time a cron is executed it will be stored a content message into the Logs section of that cron job. A log can have OK status or ERROR status.The error logs will be always stored in the system, while the successful logs will be logged depending on your Cron Job configuration. A cron job log contains the details of the last process executed, which could be the list of the appointments or the customers notified or the cause of the error found.
If the error is almost dangerous, the log is also sent via e-mail to the administrators addresses, so that they can immediately solve the problem. The logs sent via e-mail have a letter icon below the "Mailed" column.

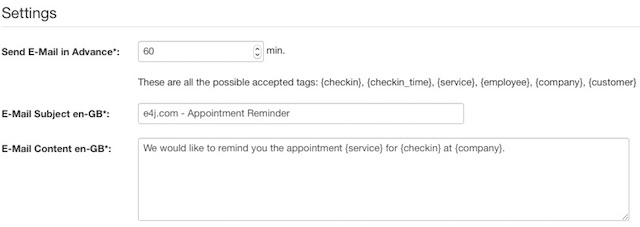
Appointment E-Mail Reminder - Cron Job
This cron job is used to send a reminder via e-mail to all the customers which have an incoming appointment.
An appointment is considered incoming when its checkin time is included between the current time and TOT minutes in the future.
- Send E-Mail in Advance - this setting is used to define the TOT minutes required for the notification.
- E-Mail Subject - specify here the subject of the e-mail. You can specify this setting for each language installed on your website.
- E-Mail Content - specify here the HTML content of the e-mail. This field accepts HTML tags and CSS tags. You can specify this setting for each language installed on your website.
Once a customer is notified from this cron job, it will no longer be contacted for the notification.
If you need to send 2 reminders in 2 different times, you have just to duplicate the cron job and change only the "Send E-Mail in Advance" setting.
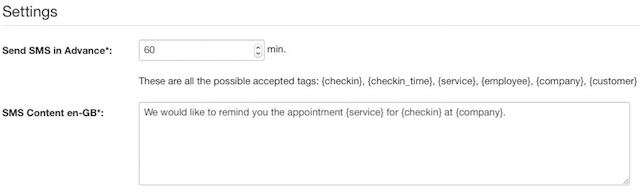
Appointment SMS Reminder - Cron Job
This cron job is used to send a reminder via SMS to all the customers which have an incoming appointment.
An appointment is considered incoming when its checkin time is included between the current time and TOT minutes in the future.
- Send SMS in Advance - this setting is used to define the TOT minutes required for the notification.
- SMS Content - specify here the plain text content of the SMS. This field should contain at most 160 characters. You can specify this setting for each language installed on your website.
Once a customer is notified from this cron job, it will no longer be contacted for the notification.
If you need to send 2 reminders in 2 different times, you have just to duplicate the cron job and change only the "Send SMS in Advance" setting.
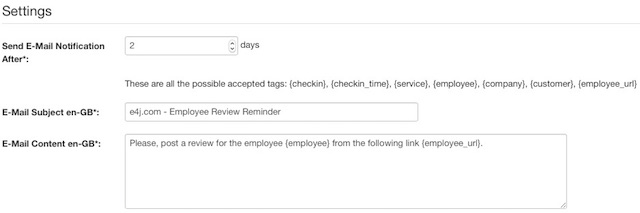
Employee Review Reminder - Cron Job
This cron job is used to remind to the customers to leave a review for the employees they met.
They will be contacted only the customers which had the checkin day, TOT days before the current day.
- Send E-Mail Notification After - this setting is used to define the TOT days required for the notification.
- E-Mail Subject - specify here the subject of the e-mail. You can specify this setting for each language installed on your website.
- E-Mail Content - specify here the HTML content of the e-mail. This field accepts HTML tags and CSS tags. You can specify this setting for each language installed on your website.
Once a customer is notified from this cron job, it will no longer be contacted for the notification.
If you need to send 2 reminders in 2 different times, you have just to duplicate the cron job and change only the "Send E-Mail Notification After" setting.
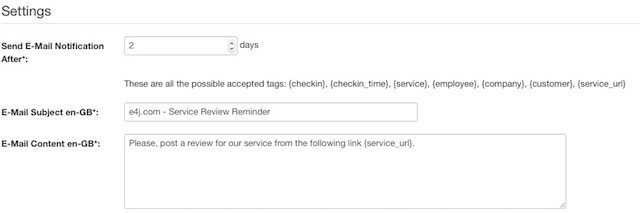
Service Review Reminder - Cron Job
This cron job is used to remind to the customers to leave a review for the services they received.
They will be contacted only the customers which had the checkin day, TOT days before the current day.
- Send E-Mail Notification After - this setting is used to define the TOT days required for the notification.
- E-Mail Subject - specify here the subject of the e-mail. You can specify this setting for each language installed on your website.
- E-Mail Content - specify here the HTML content of the e-mail. This field accepts HTML tags and CSS tags. You can specify this setting for each language installed on your website.
Once a customer is notified from this cron job, it will no longer be contacted for the notification.
If you need to send 2 reminders in 2 different times, you have just to duplicate the cron job and change only the "Send E-Mail Notification After" setting.
Employee Subscription Reminder - Cron Job
This cron job is used to remind to the employees that their subscription is going to expire.
They will be contacted only the employees with a subscription which will expire in TOT days.
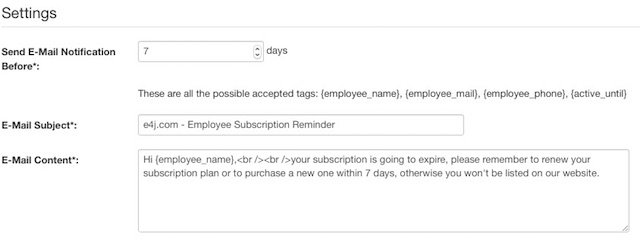
- Send E-Mail Notification Before - this setting is used to define the TOT days required for the notification.
- E-Mail Subject - specify here the subject of the e-mail.
- E-Mail Content - specify here the HTML content of the e-mail. This field accepts HTML tags and CSS tags.
Once an employee is notified from this cron job, it will no longer be contacted for the notification.
If you need to send 2 reminders in 2 different times, you have just to duplicate the cron job and change only the "Send E-Mail Notification Before" setting.