Your cart is empty!
Available Positions
Since the 1.7.3 version of VikAppointments it is possible to render standard form fields simply by constructing an associative array in a specific way. The following JSON represents a basic structure used to display a new field (fieldname) into the fieldset position.
{
    "fieldset": {
        "fieldname": {
            "type": "[TYPE]",
            "label": "[LABEL]",
            "value": "[VALUE]"
        }
    }
}
In case the specified fieldset is supported by the page, the fields will be pushed within the related position. Otherwise they will be added in a completely new section.
Detect Supported Positions
It is possible to detect what are the supported positions by installing the e4j - VikDev plugin. The first thing to do is copying the following URL.
Afterwards you should open the back-end of your Joomla! and visit the installation page, which may vary depending on your current version:
- Extensions > Manage > Install on Joomla! 3;
- System > Install > Extensions on Joomla! 4.
From this page you should access the Install from URL section and paste the previously copied URL into the apposite field. Hit the Check and Install button to download and install the module. Finally visit the plugins page to activate the newly installed plugin.
Once the plugin has been activated, the pages that allows the extendibility of the fields should look like the one described in the following image.

Alternatively it is possible to inspect the source of the pages through the browser inspector and search by the "customizer" word. You should be able to find some occurrences similar to this one:
{"rule":"customizer","event":"onDisplayView{PAGE}","key":"{FIELDSET}","type":"[field|fieldset|...]"}This is an HTML comment that describes the following information:
event- the callback (or method) name to use while developing your own plugin;key- the name of the section in which the fields should be pushed;type- the type of the container.
Practical Example
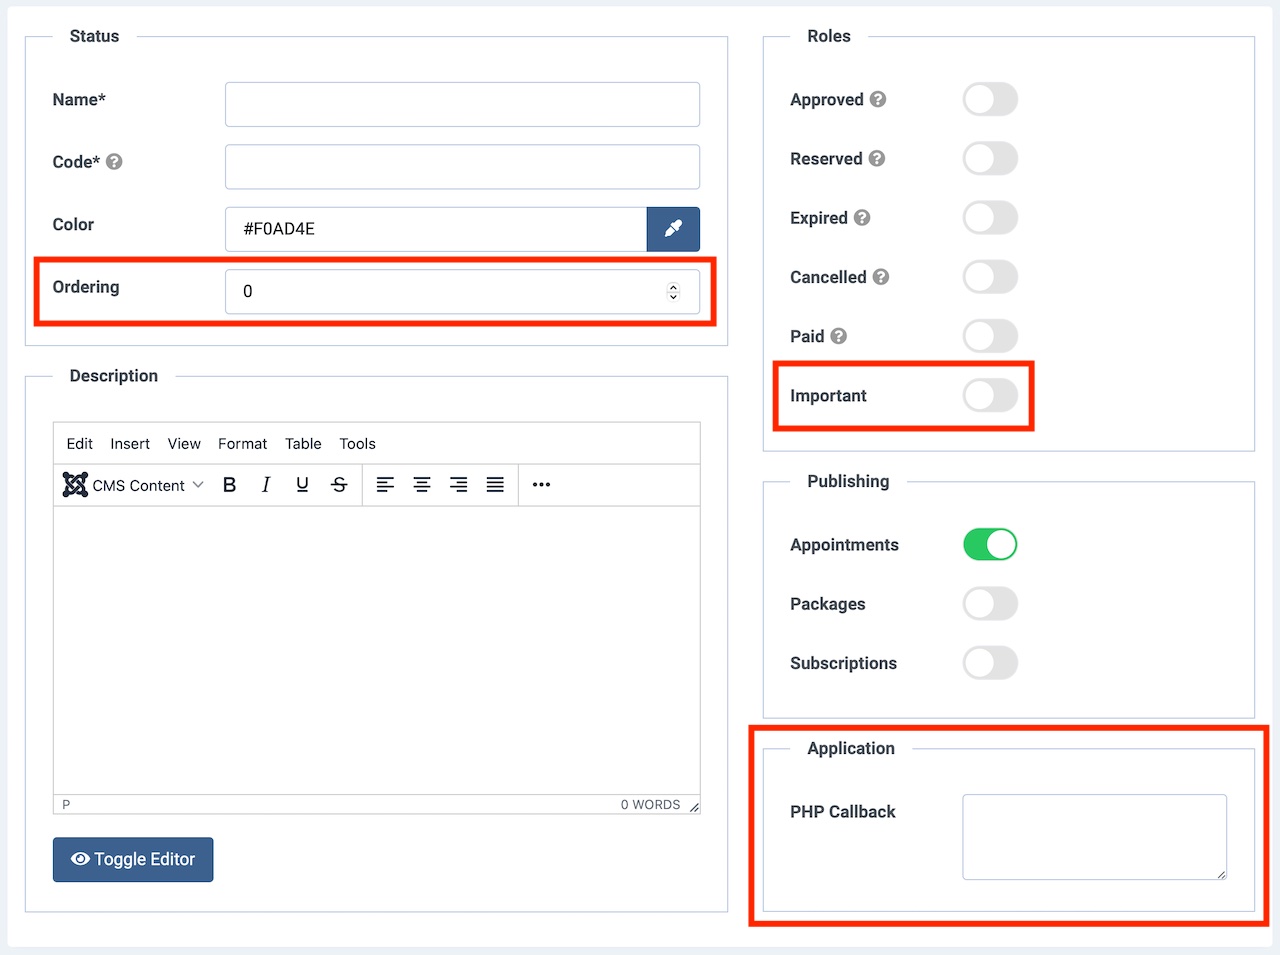
Let's assume that we want to enhance the management of the status codes by adding 3 additional fields:
- an input number to manually enter the ordering amount of the status code;
- a checkbox to assign an important role to the status code;
- a text area to type a PHP callback to invoke every time the status is selected.
public function onDisplayViewStatuscode($view)
{
    return [
        // target "status" fields box
        'status' => [
            // create "ordering" field
            'ordering' => [
                'type' => 'number',
                'label' => 'Ordering',
                'value' => @$view->status->ordering,
                'min' => 1,
                'step' => 1,
            ],
        ],
        // target "roles" fields box
        'roles' => [
            // create new "important" field
            'important' => [
                'type' => 'checkbox',
                'label' => 'Important',
                'value' => @$view->status->important,
            ],
        ],
        // add a new "application" fields box
        'Application' => [
            // create new "callback" field
            'callback' => [
                'type' => 'textarea',
                'label' => 'PHP Callback',
                'value' => @$view->status->callback,
                'height' => 80,
            ],
        ],
    ];
}
This is how the management page of a status code will look after applying the mentioned example code.
Changelog
| Version | Description |
|---|---|
| 1.7.3 | Introduced. |
Last Update: 2022-03-09 13:43
Helpful?