macOS
It is possible that the application is not able to use the preferred configuration of the printer. For this reason, you might have to permanently set those changes as default settings.
In macOS this can be done by accessing CUPS, an open source printing system developed by Apple Inc. CUPS uses the Internet Printing Protocol (IPP) to support printing to local and network printers. It is possible to access CUPS directly from your browser, simply by typing http://localhost:631 from the address bar.
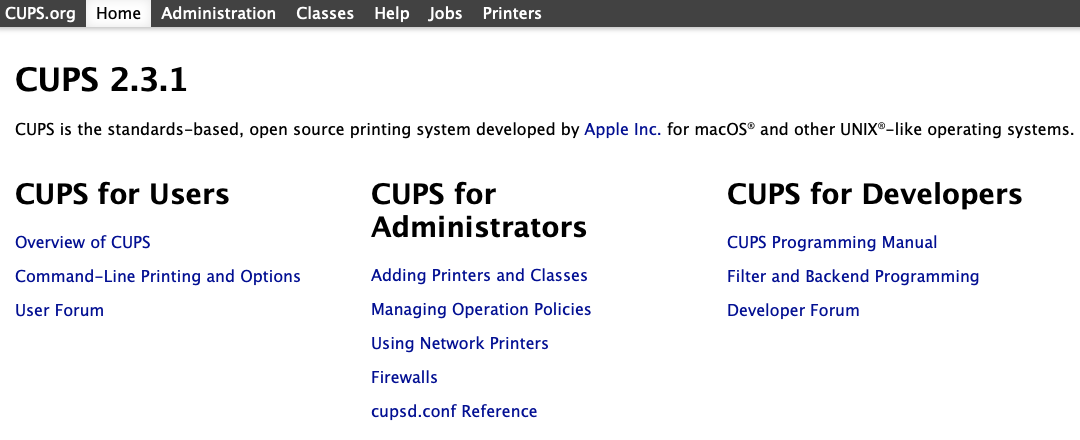
At this point, you should see a page similar to this one:

You should now click the Printers button under the main menu. Should you see a message saying that the web interface is disabled, then open Terminal application and run the following command:
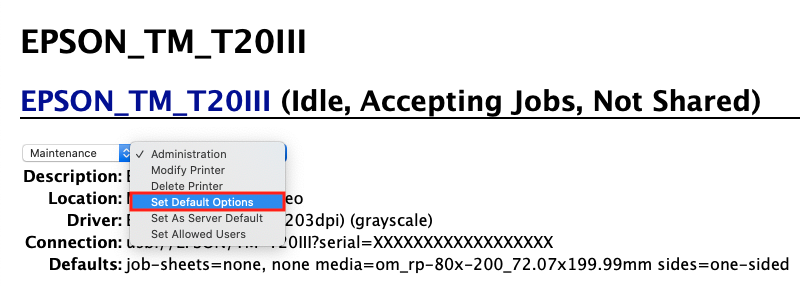
cupsctl WebInterface=yesBy refreshing CUPS, you should now be able to see a list of installed printers. Click one of the available printers to access its configuration, where you should see 2 different dropdown: Maintenance and Administration. As described in the following screenshot, you should click the "Administration" dropdown and pick "Set Default Options".

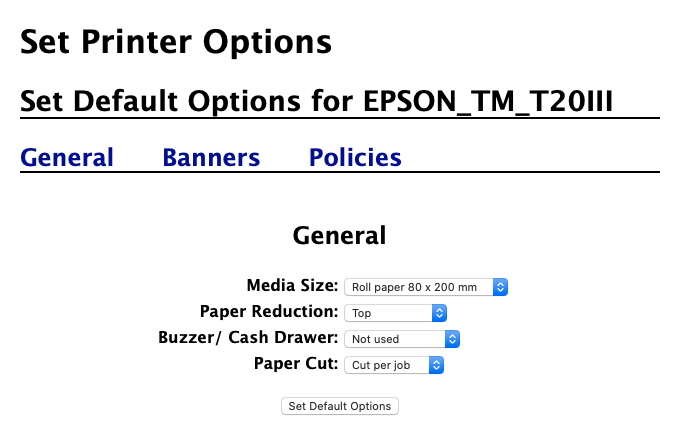
Afterwards, the browser should display a configuration page with all the settings supported by the printer, which may grouped under different tabs. In our case, the printer let us configuring the following options:
- Media Size - the default size of the page to print.
- Paper Reduction - a system to stop printing when there are no more line to include within the page. We personally had to disable this option because it was cutting off the last line of the paper.
- Buzzer/Cash Drawer - the possibility of auto-opening a connected cash drawer while printing a page.
- Paper Cut - whether the printer should auto-cut the paper roll or not after printing the page.
Click the Set Default Options button to permanently apply the changes to all your future jobs.
